DIY: Making Snowmen
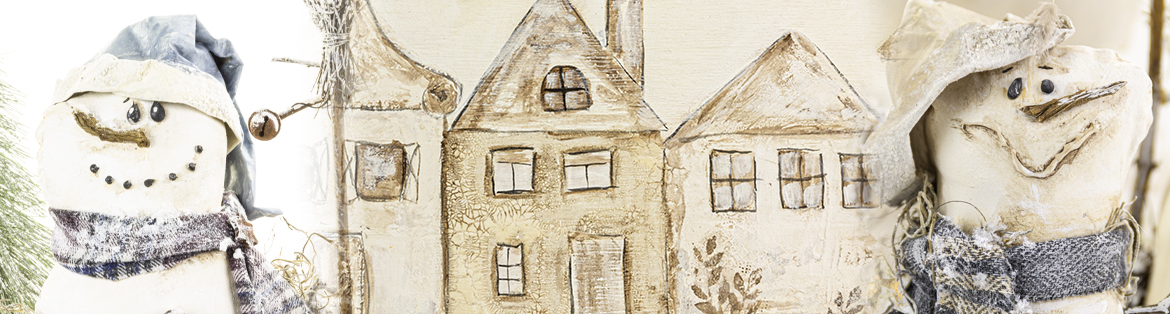
These soft snowmen are fun and easy to create using just a piece of cotton fabric, some filling, and a few decorative touches. Let your creativity guide you – every snowman becomes a unique and charming handmade creation.
01-11-2025, 00:00
DIY: Making Snowmen – Step by Step
These soft snowmen are easy to make with a piece of cotton fabric, some filling and a few creative details. Let your imagination guide you: every snowman will be unique.
How to make the snowman
1. Sewing the snowman
- Cut and sew the shape of the snowman.
- Leave a small opening at the bottom so you can turn and stuff it.
- Stuff the snowman firmly and then sew the opening closed neatly.
2. Strengthening the body with Powertex
- Coat the entire snowman with Powertex Ivory and let it dry (you can speed this up with a hairdryer).
- Repeat this step once more.
- The next day the snowman will be firmer and ready to decorate.
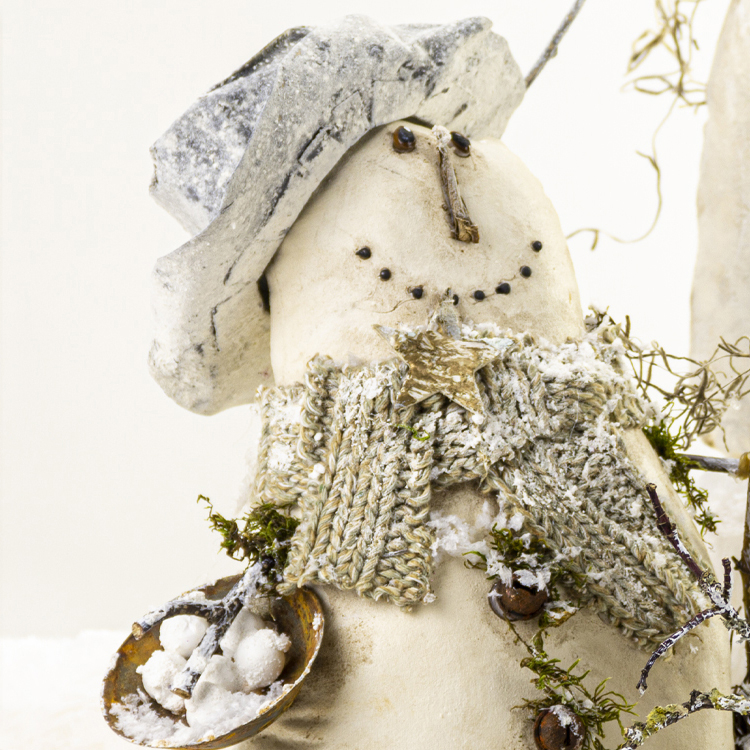
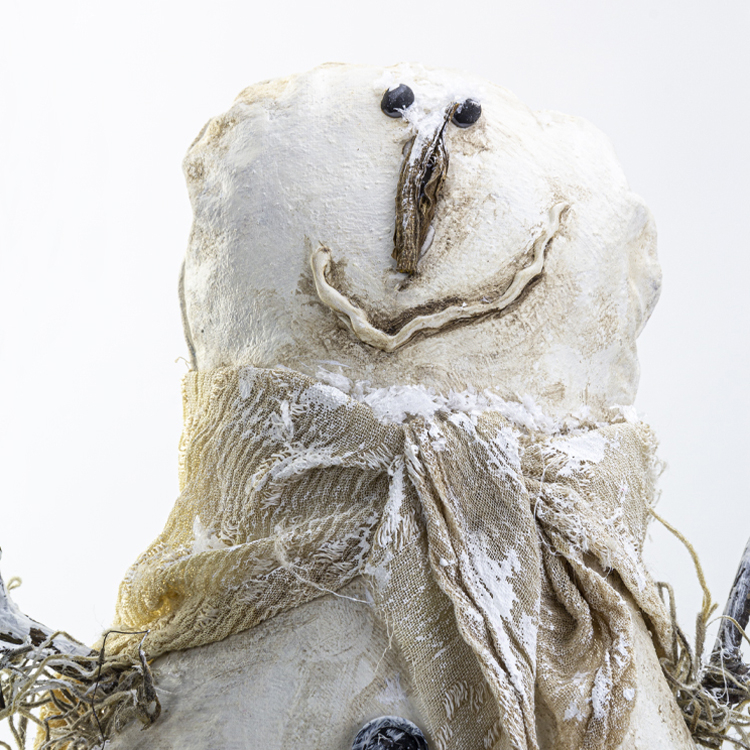
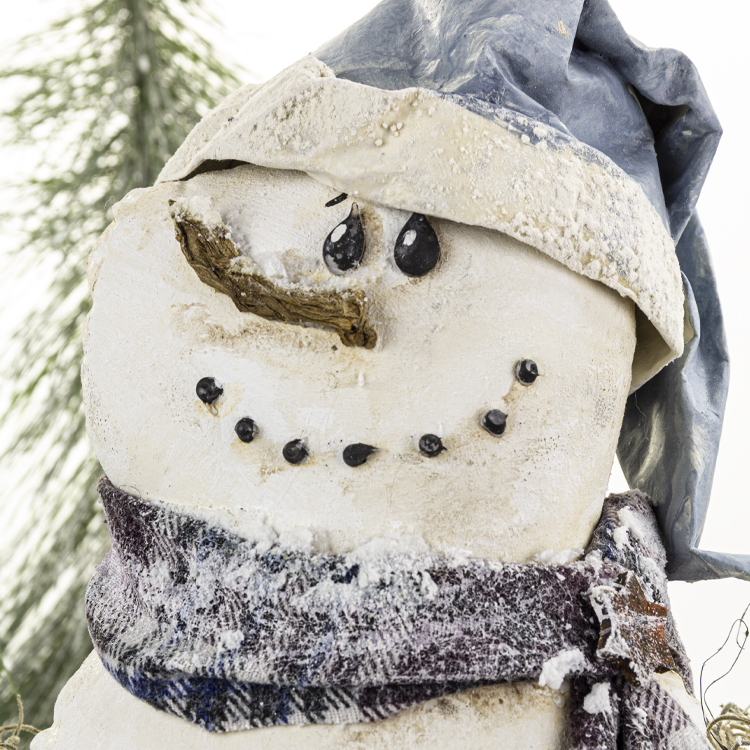
3. Decorating: buttons, nose, scarf and more
- Decorate the snowman with buttons, a small nose, a scarf and any other fun details.
- Use your creativity: no two snowmen need to look the same.
4. Attaching the arms
- Make a small hole on each side of the snowman.
- Fill the hole with hot glue and insert a small twig or stick.
5. Eyes and mouth
- The eyes can be made from small seeds, a tiny felt circle or simply a drop of glue.
- For the mouth, use several small glue dots or a fine line of glue.
6. Shading for depth
- Mix Provincial Beige and Burnt Umber separately with Retarder.
- Use these mixes to add soft shading around folds, buttons and other details.
- Thanks to the Retarder you can easily blend the paint and partially wipe it back.
- Then paint the areas that need to be black.
7. Extra winter details
- Add a hat, a broom, a scarf, little bells, moss or any other accessories you like.
- Finish with a light touch of white paint for a real winter look.
Tray as a winter street background
Would you like to create a complete little winter scene? Use a wooden tray as a background for a small snowy street.
1. Painting the tray
- Use the same paint colours as for the snowmen.
- Apply one or two coats of white paint.
- Lightly sand after the first coat for a smooth finish.
2. Drawing and painting the houses
- Sketch small houses (for example from a reference photo) loosely onto the tray, they do not need to be perfect.
- Paint the houses in different tones with a warm sepia look by mixing Provincial Beige and Burnt Umber.
- Add windows, doors and shutters.
3. Details and finishing
- Outline the contours of the houses to make them stand out.
- Optionally apply some crackle medium in places for a weathered effect.
- Finish with a coat of matte varnish.
Materials used
- Piece of cotton fabric (old or new)
- Stafil filling: 79904, 79905, 79906, 79909
- Powertex Ivory: 1996813
- Jo Sonja’s Retarder Medium: 58603 (60 ml) or 583703 (237 ml)
- Paint: white, black, Provincial Beige 57029, Burnt Umber 57007 (75 ml) or 97007 (250 ml)
- Hairdryer, glue gun, brushes
- Small sticks, wooden shapes, Stafil embellishments
- Snowflakes to Scatter: 44684 etc.
- Fabric scraps, rusty bells, buttons, moss or tillandsia 42666, small seeds (for example star anise)
Necessities


")


info@kippershobby.nl
+31(0)38 3756789
Copyright 2026, KippersHobby